Intro
Optimizer can tune targeting settings for you based on pre-defined rules. Below you may find examples of rules and techniques most common for performance-oriented campaigns. While parameters may be altered to match the specifics of particular business, general structure is versatile.
But first let’s see how Optimizer rules are created. The process is straightforward:
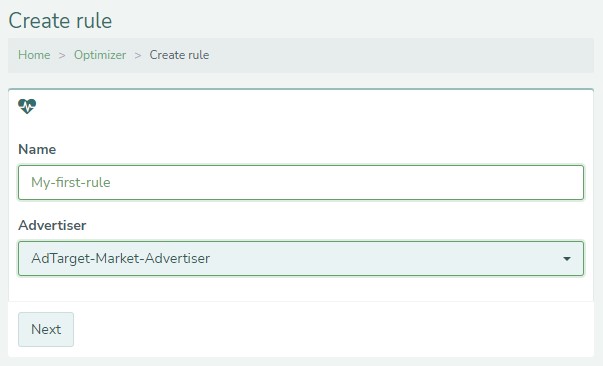
Step 1: Click Create and give your new rule a name and choose the Advertiser from dropdown list then hit Next
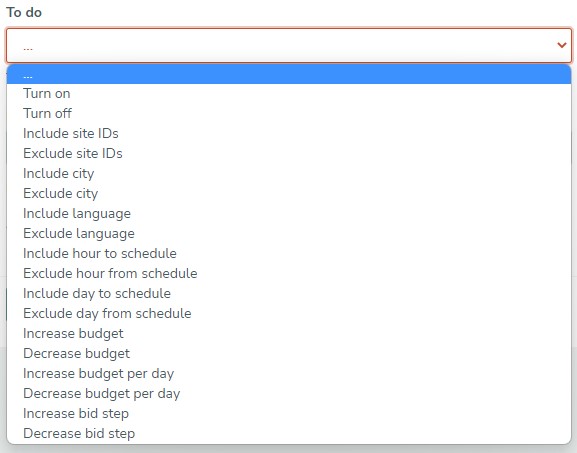
Step 2: From To do dropdown list choose an action to be accomplished by Optimizer when conditions set in your rule are met. For example, form a blacklist by Excluding site IDs from targeting
Step 3: Choose the period in days for which statistical data will be taken
Note: Keep in mind that if campaign doesn’t have enough historical data the rule will not work

Step 4: Finally, set the rules to be checked by Optimizer. If the result of check is True – the action defined in To do section will be triggered.
For example, let’s make a rule which will weed out the websites which gained 5 000 impressions or more and their CTR is lower than 0,1%. That’s how it will look:

Toggler is set to AND position, which means both conditions below must be true for rule to work.
When done, hit Save and the rule will be created and ready to be applied to Campaign or Media in Optimizer section of targeting. Just like this:

Now that we know how to create Optimizer rules, let’s review some examples which definitely will make your life easier.
Website blacklisting
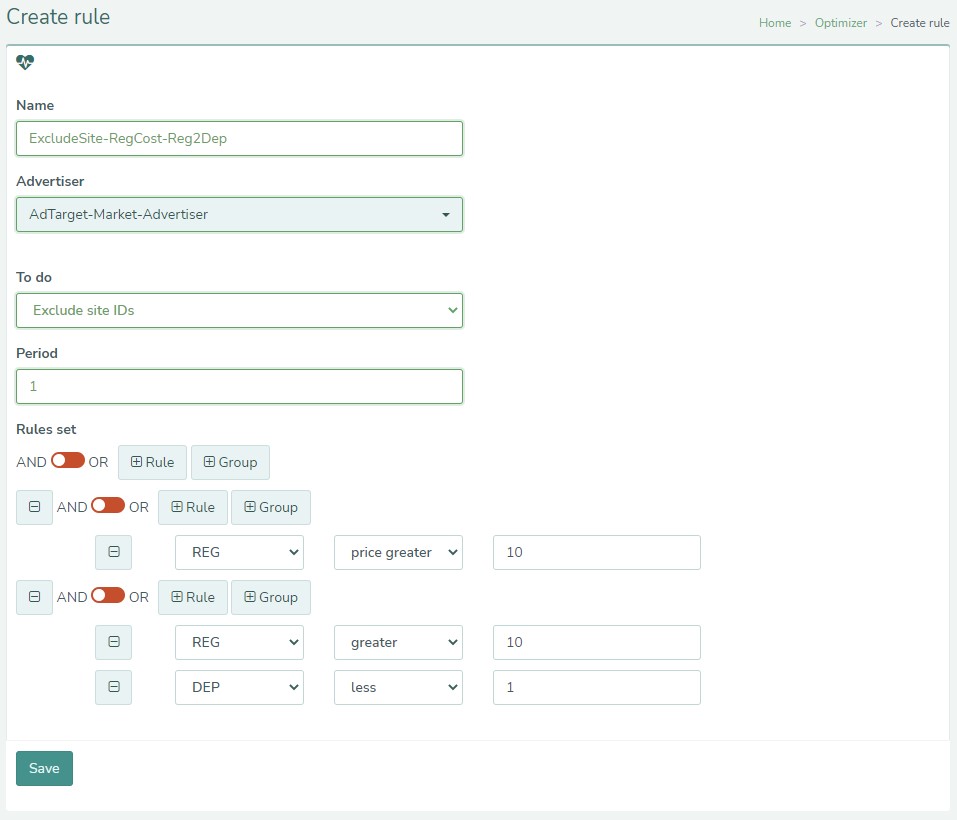
One of the most effective techniques of eliminating budget waste is to eliminate the websites with traffic which doesn’t convert. The multilayered rule below would inspect each website for Registration cost (in this example target cost is 10 EUR) and then whether registrations convert into Deposits (for example Registration to Deposit conversion rate is set to 10%). For each vertical the names of metrics may differ, but usually the logic is persistent for any business: check whether traffic converts into leads and if leads convert into paying customers. Rule cadence is set to 1 day, depending on business specifics this value may be altered to meet the benchmarks.
ExcludeSite-RegCost-Reg2Dep
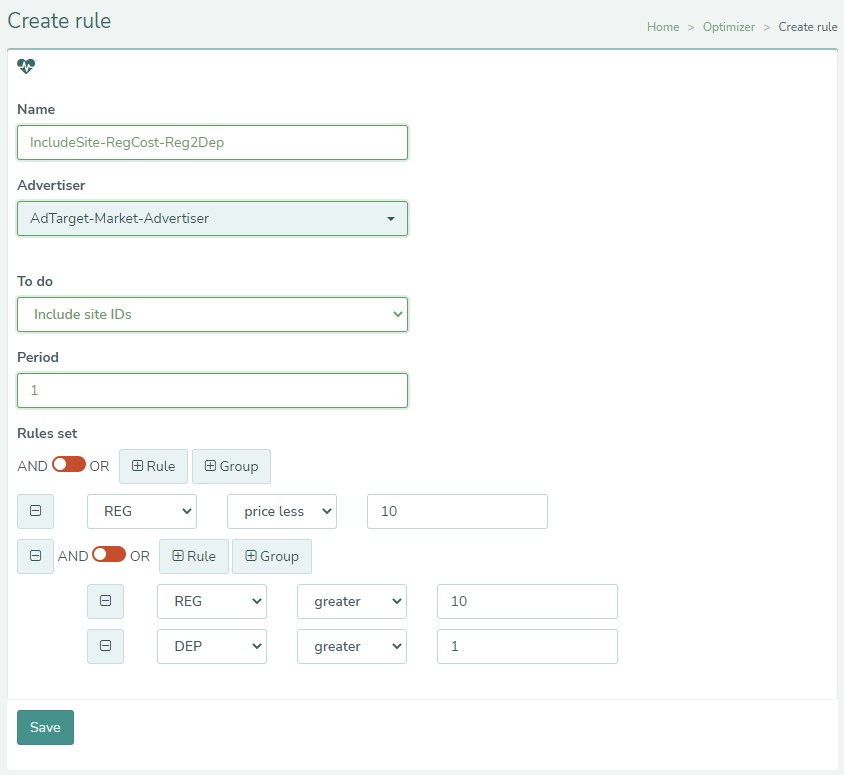
There might be a time lag between different conversions, like Clicks and Registrations, Registrations and Deposits etc. Therefore, it’s worth setting an opposite rule which would return a website if delayed conversions significantly improved its performance.
IncludeSite-RegCost-Reg2Dep
Location Switch-Off
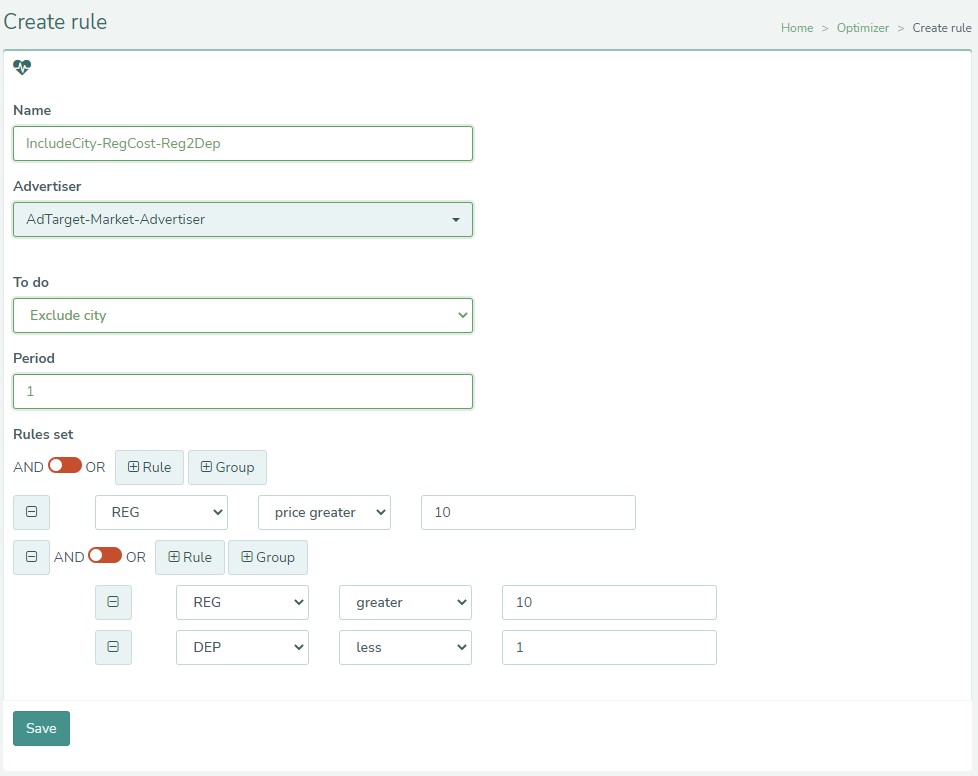
Another technique might be useful for advertisers who work with WW traffic or large GEOs where performance is not homogenous across the whole territory. Similarly to previous rules this one can exclude cities from targeting if they don’t meet performance targets.
ExcludeCity-RegCost-Reg2Dep
In the same manner Optimizer can exclude or include in targeting languages, hours of a day and days of week.
Bid change
Now we know how to exclude low performing websites, cities, languages, hours, and days. Can we go beyond that and set more refined tuning on the inventory that’s left? Of course, we can!
Optimizer can constantly increase the bid while certain condition is met. For instance, to client acquisition campaign we can apply a rule which would increase bid step by 10% every day until CPC is lower than 0,1 EUR and Registration cost is below 10 EUR.
IncreaseBidstep-CPC-RegCost
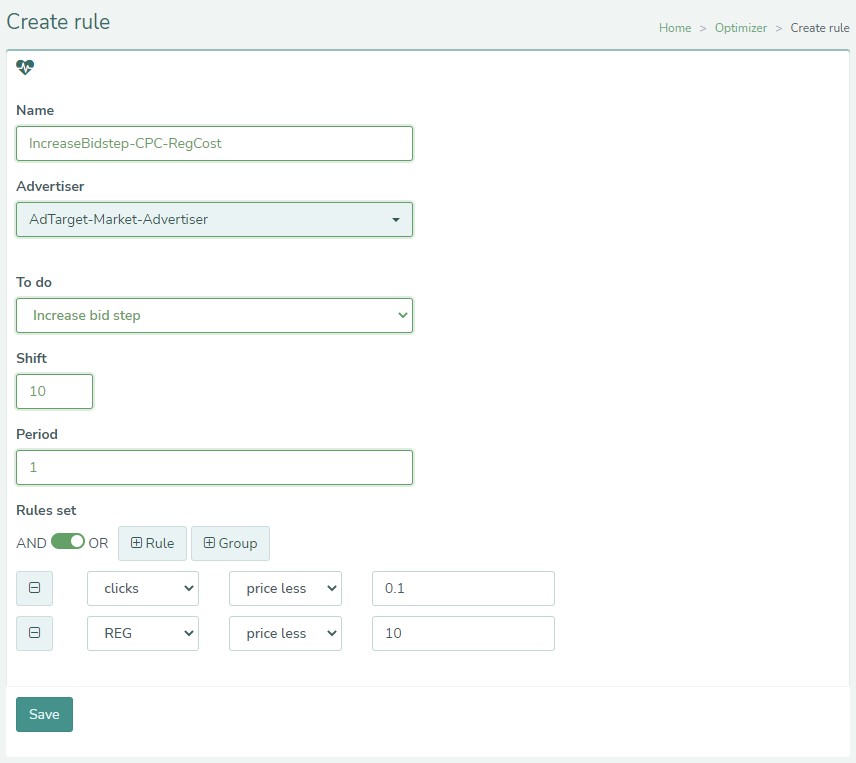
You might’ve noticed that the toggle is switched to OR logic, which means that I’m eager to increase the bid either whet CPC or cost of Registration is within my target.
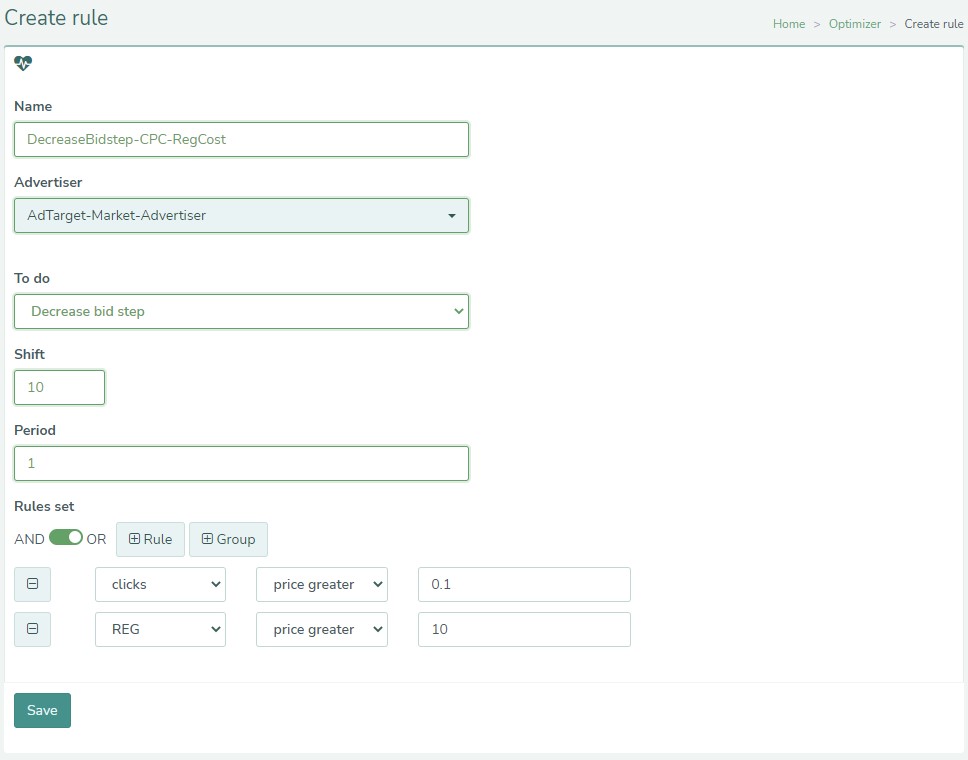
And to perfect the automation logic we must set the opposite rule which would decrease the bid step when the values go beyond optimal.
DecreaseBidstep-CPC-RegCost
Knowing these core approaches, you can use them after amending metric values per your needs, so as build upon them more complex and advanced hierarchy of rules.
Note to self: Never stop optimizing!